Friday, June 19, 2015

Art Attack! Making a zig zag photo frame

You know that show Art Attack? I've loved it since I was a kid. I used to watch Neil Buchanan whip up all sorts of cool stuff, and I used to think to myself, "Gosh! That's so cool!" These days, I enjoy watching Art Attack with my kids on the Disney Channel (Astro Ch 615).

7

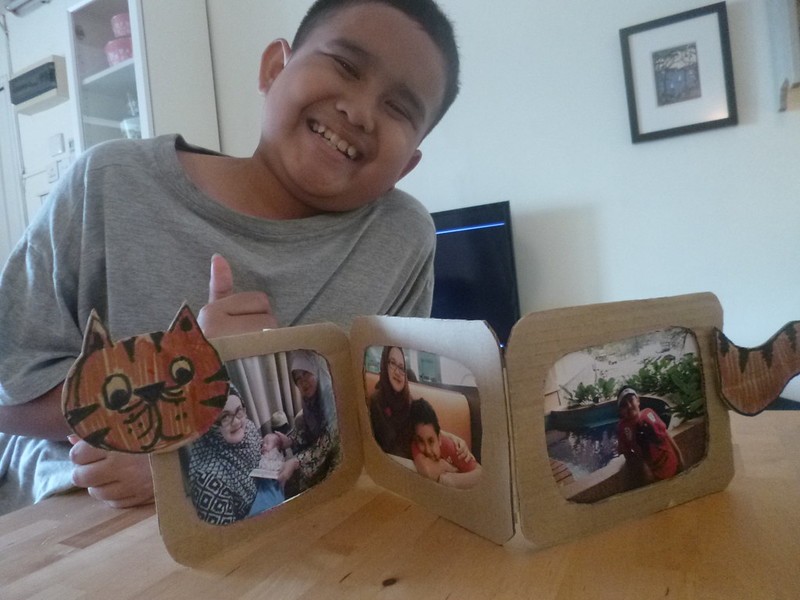
During the recent school holidays, Amir and I tried our hand at making an Art Attack Zig Zag Photo Frame using materials we had at home. Here's how we made it:

1
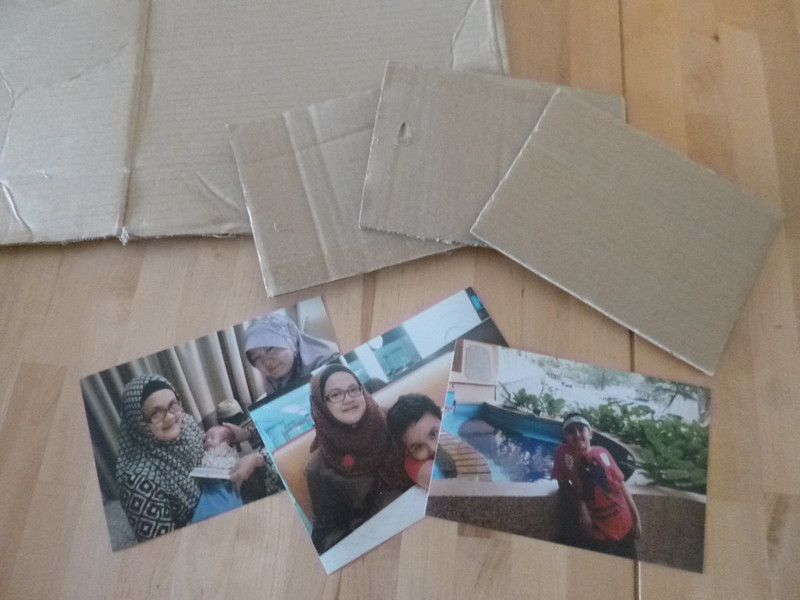
1. First, we assembled our materials. We dug up some family photos and got some corrugated board. I cut the corrugated board into three pieces, in a size slightly larger than our photos.

2
2. Then Amir cut holes in the middle of the corrugated boards to make frames.

3
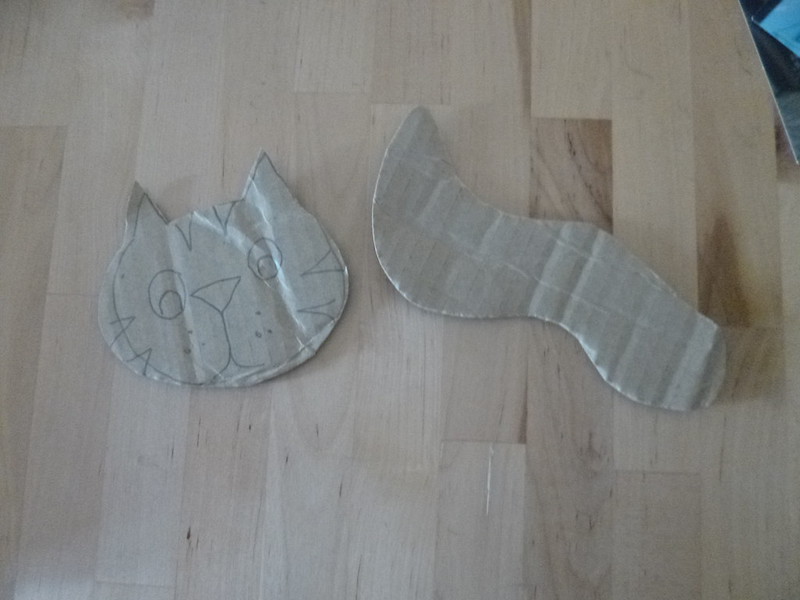
3. Amir decided that he wanted a cat on our photo frame, so he drew a cat's head and tail and cut them out.

5
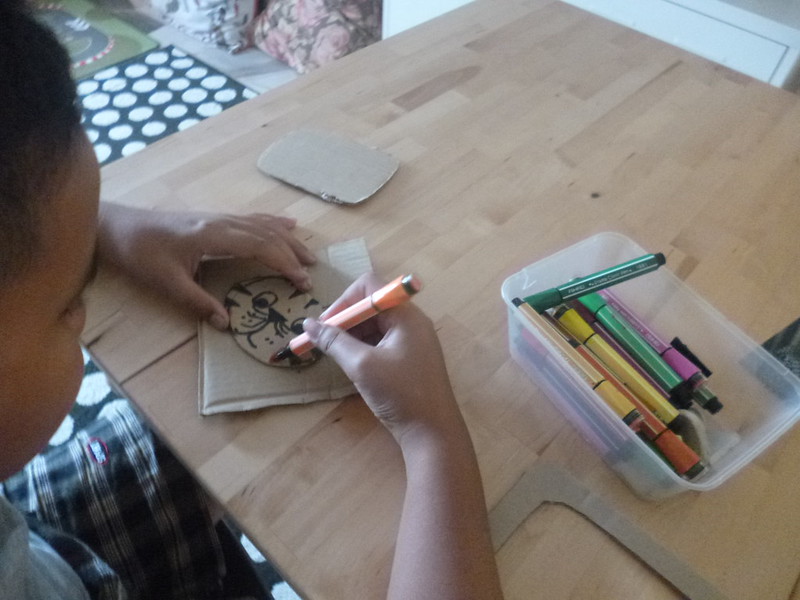
4. Amir then added some details to the cat using marker pens.

4
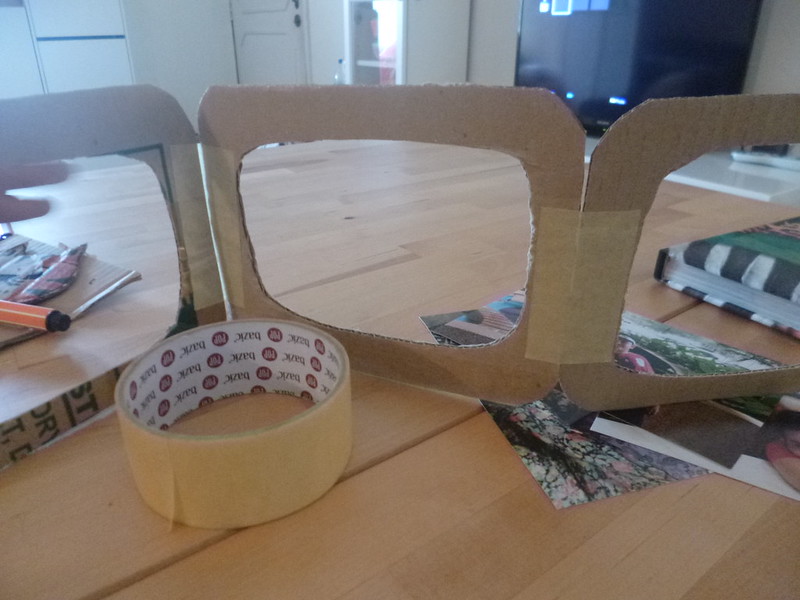
5. We then attached the frames together with masking tape, so they formed a zig zag shape.

 6
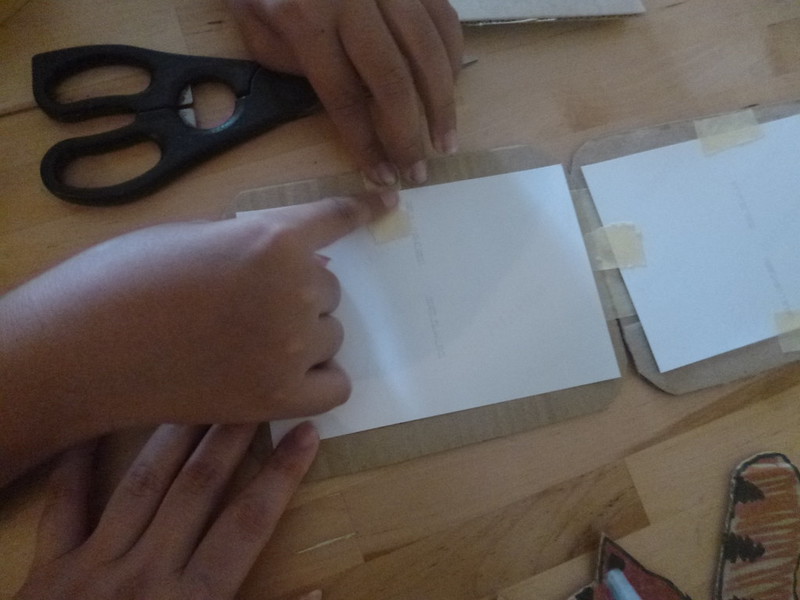
6. Then we attached our photos to the photo frame using more masking tape.

IMG_20150619_144258
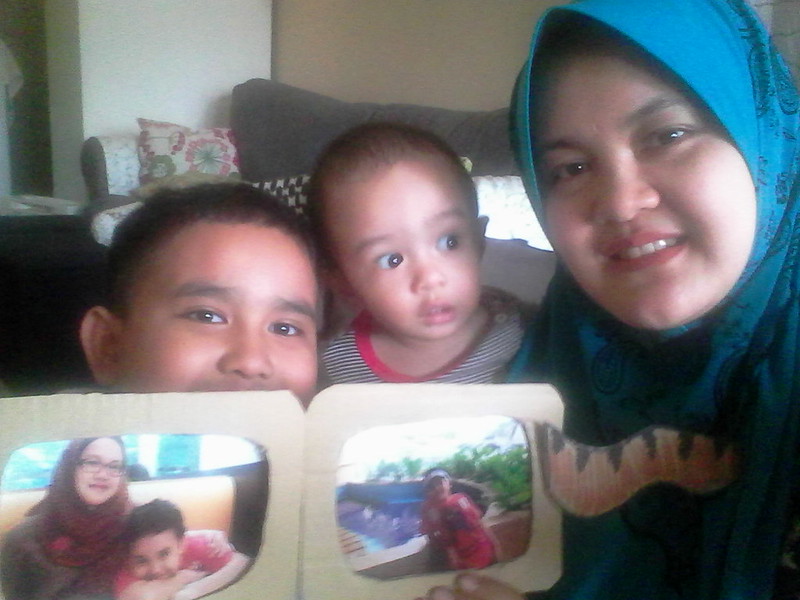
7. And that's it! We're done! It was a fun and quick activity ans we love how it turned out (Even baby approves).

If you'd like to learn how to create cool crafts with your kids like this, be sure to catch the new season of Art Attack! Just join  new host of Disney’s Art Attack, Marco M. Borromeo on Disney Channel (Astro Ch 615) every Saturday and Sunday at 12noon. Watch the Art Attack Season's Four Trailer here:


Now in its fourth season, Disney’s Art Attack is the award-winning program that has introduced millions of children to the joy of art. Fret not if you can’t paint within the lines and don’t worry if your dog clay model looks like a mouse – Marco will show you that all you need is lots of creative ideas and loads of enthusiasm. So what are you waiting for? Tune in and be ready to get Art Attacked!

Tuesday, June 9, 2015

Homemade okonomiyaki - so easy!


Okono

So, I recently discovered an awesome YouTube channel called Waoryu Only In Japan, and have been binge-watching episodes over the past few days. And somehow, as a result, I developed an intense craving for Japanese street food... especially after the Dotonburi and Hirohima Okonomiyaki lunch experiment episodes! I decided that I HAD to make some Okonomiyaki, and so I YouTubed a few recipes to see if I could make it at home. To my delight, okonomiyaki IS very easy to make and I had all the ingredients on hand, except for dashi and bonito flakes. But, as always, I improvised and the results was just as delicious.

Check out my recipe after the jump...

Thursday, June 4, 2015

Our stay @ Colmar Tropicale

We recently enjoyed a short stay at Colmar Tropicale, and as it was our first time there, I thought I'd blog about my first impressions of this popular holiday destination. First of all, the climate isn't very cool, unlike my memories of Genting Highlands and Fraser's Hill from years back. Sometimes, it can get pretty warm when the sun is out, so there's really no need to pack a sweater or anything. There isn't even a chill at night, I found. 

Colmar tropicale

Secondly. the place looks great in pictures. Be it on other websites or blogs, and even in my own photos, everything looks pretty awesome. In real life, however, it's not quite as charming as I had hoped. Even if you've never been to France, or any European country for that matter, you'll be able to tell right away that the architecture and decor here is lacking authenticity. Plus, it's hard to have an immersive experience when game arcades and 6D adventure rides are among the shops lining the street. I mean, I don't really mind that they're there and Amir did have fun trying them out, but perhaps they could have been incorporated a little more discreetly. 

Also, if you tend to pay attention to details, like I often do, you'll notice that lots of things in the town need a repair or replacement, or an upgrade. And speaking of the town, which is pretty small, you can pretty much see everything you need to see in it in just a few hours. So if you're staying for more than a day, it could pretty boring after a while, even with the other attractions at Berjaya Hill.

Monday, June 1, 2015

My (Malaysianised) Homemade Kimchi Recipe

Ok peeps, I love Korean food, especially kimchi, but the store-bought stuff can be pricey. I've made sauerkraut before, using my leftover cabbage, but I'm not a big kraut fan. So I decided I'd twist my kraut recipe a bit and make kimchi. My recipe uses ingredients we can easily find here in Malaysia, and to me it tastes just as good. Here goes.... 

Kimchi

Adline's (Malaysianised) Homemade Kimchi Recipe

Serving: One jar

Ingredients
Cabbage - washed and chopped (For this jar, I used about a quarter of a head)
Half a carrot - Chopped into matchsticks (It should really be daikon, but I don't have any on hand)
1 stalk green onion - Chopped to 1 inch lengths
3 cloves garlic - Sliced
2 red chillies (You can use more for extra heart. It's supposed to be Korean chilli powder, but I substituted)
1 tablespoon of dried shrimp, washed and soaked
Salt - about 3 tablespoons (It's a lot, but don't worry as it will turn into lactic acid)

Method
1. Blend together red chillies and dried shrimp (do not add water)
2. Place all ingredients in a large bowl and mix well
3. Sterilise your jar and stuff everything inside (Really pack everything in. You might have to start with a larger jar, and then after the cabbage has softened, you can transfer to a smaller jar)
4. Leave the jar on your kitchen counter for 2-3 days (Malaysia is hot and humid, especially in the kitchen, so the fermentation occurs quite fast). After that, taste it to determine how fermented you want it to be.
5. Once happy with the state of fermentation, you can keep the jar in the fridge.

Note: You can Google how others do it too, some people use special jars that will let the CO2 out, and prevent bacteria from getting in. I find that fermenting for 2-3 days in small batches doesn't usually cause much gas build up, so I don't leave my jar lid slightly ajar etc. But if you like, you can place a clean cloth over the mouth of the jar and tie a rubber band around it to allow the fermented cabbage to breathe.

Happy fermenting!

Welcome 2019: Time to Grow

Happy New Year everyone! I'm so so excited for 2019 and everything that it'll bring. I'm starting the year with gratefulness for...